
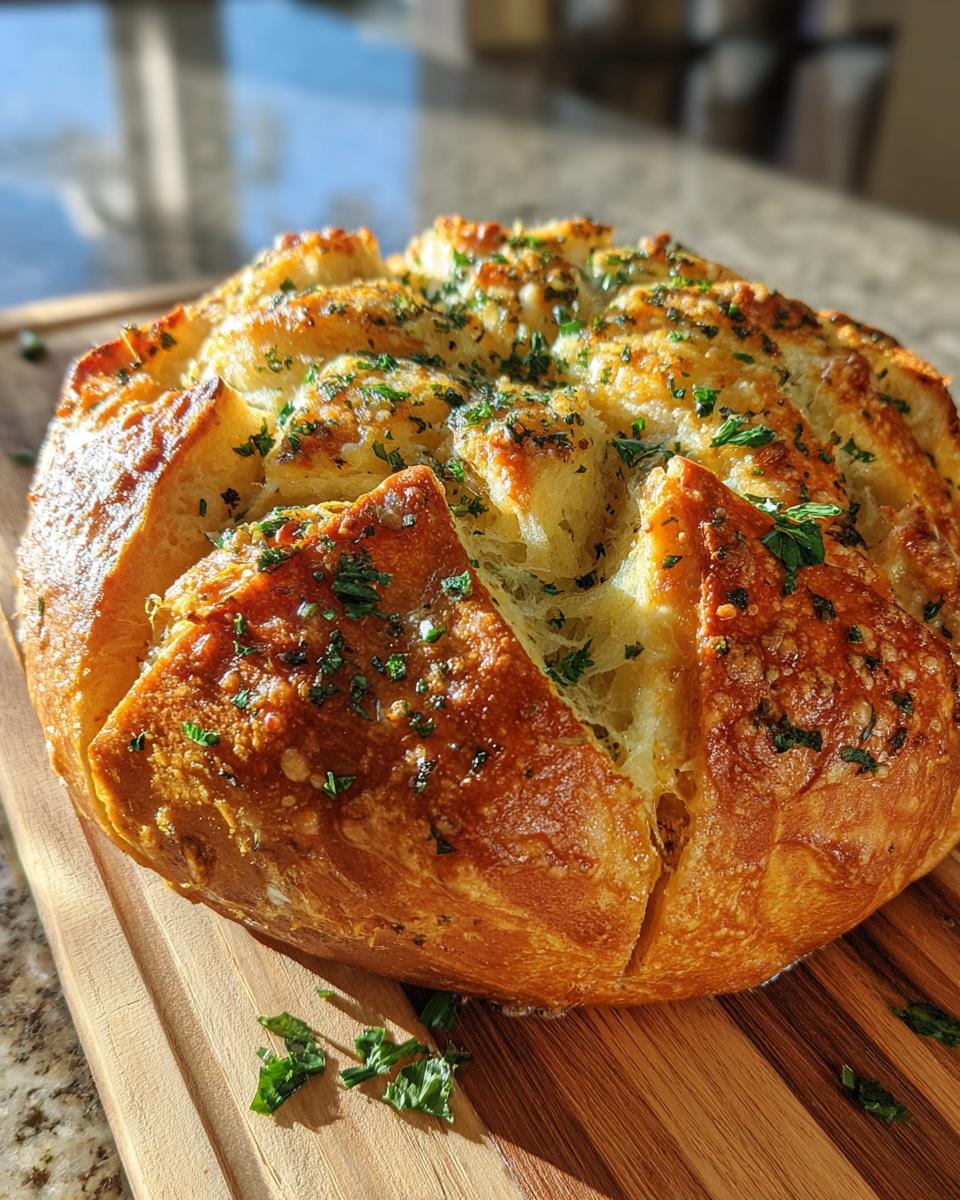
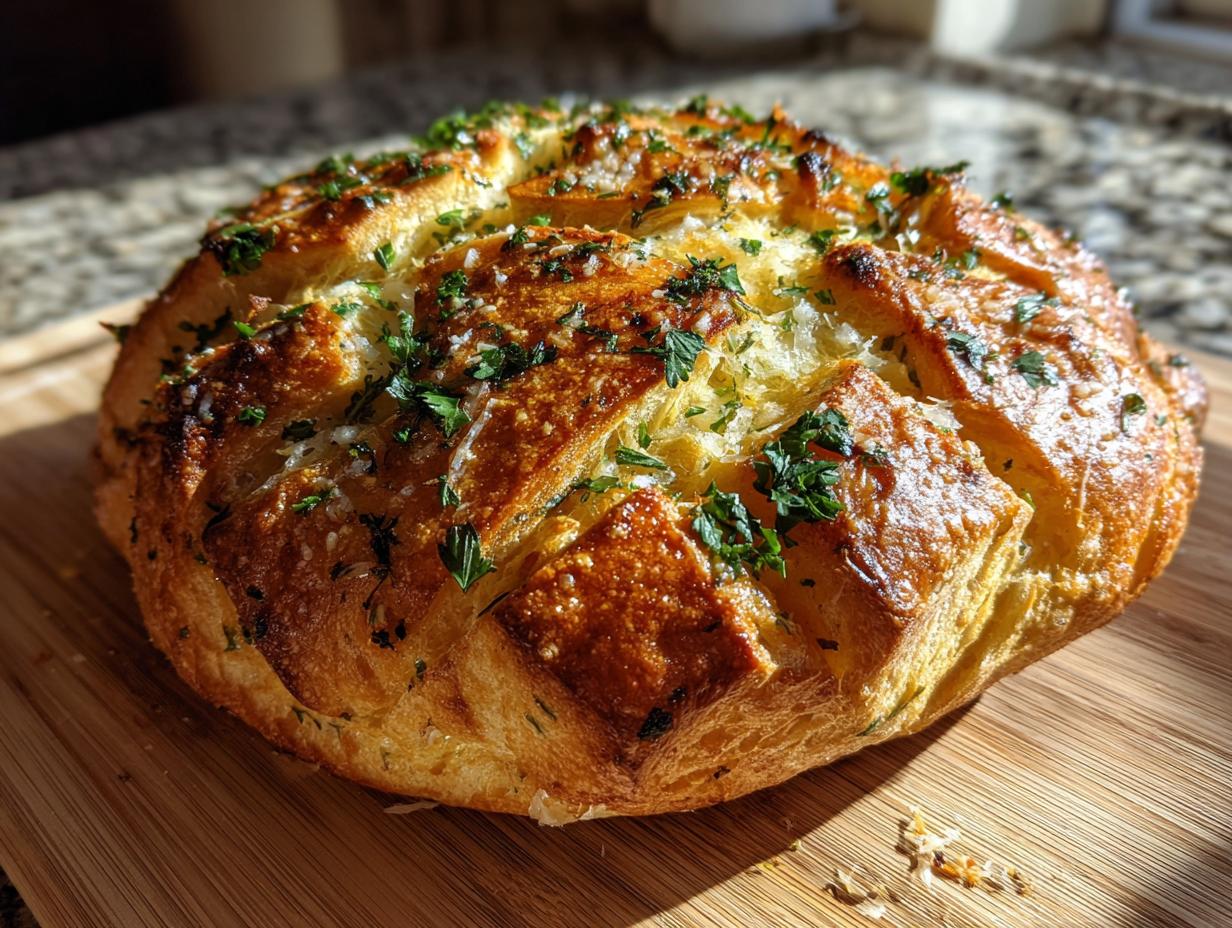
Oh my goodness, let me tell you about this Garlic Parmesan Snowflake Bread! It’s not just any bread; it’s an experience that fills your kitchen with the most mouthwatering aroma. The combination of garlicky goodness and cheesy richness is simply divine! I love how the unique snowflake shape makes it perfect for gatherings or just a cozy night in with a warm bowl of soup. Trust me, when you pull this gorgeous loaf out of the oven, your friends and family will be clamoring for a piece. It’s the ultimate comfort food and a true delight to make!
Ingredients List
- 2 cups all-purpose flour
- 1 packet (2 1/4 tsp) active dry yeast
- 1 teaspoon sugar
- 1 teaspoon salt
- 3/4 cup warm water (about 110°F or 43°C)
- 2 tablespoons olive oil
- 4 cloves garlic, minced (fresh is best for that amazing aroma!)
- 1/2 cup grated parmesan cheese (don’t skimp here; it adds so much flavor!)
- 1 tablespoon fresh parsley, chopped (for that lovely garnish)
How to Prepare Garlic Parmesan Snowflake Bread Recipe
Step 1: Activate the Yeast
First things first, let’s wake up that yeast! In a bowl, mix together the warm water, sugar, and yeast. Make sure the water is around 110°F (43°C) – it should feel warm to the touch but not hot! Let this sit for about 5 minutes until it’s bubbly and frothy. This means your yeast is ready to party!
Step 2: Combine Ingredients
Now that your yeast is activated, it’s time to bring everything together! Add the flour, salt, olive oil, minced garlic, and grated parmesan cheese to the yeast mixture. Each ingredient plays a crucial role: the flour provides the structure, the salt enhances flavor, the olive oil adds moisture, garlic gives that irresistible aroma, and parmesan? Oh, that’s just the cherry on top!
Step 3: Knead the Dough
Time to get your hands a little messy! Turn the mixture out onto a floured surface and knead the dough for about 8 minutes. You want it to be smooth and elastic – if it’s sticky, sprinkle a bit more flour. You’ll know it’s ready when you can poke it, and it springs back at you. Trust me, it feels super satisfying!
Step 4: First Rise
Place your beautiful dough in a greased bowl, cover it with a clean towel, and let it rise in a warm spot for about 1 hour, or until it’s doubled in size. This is where the magic happens, so be patient! You can use this time to clean up or maybe have a little dance party in the kitchen.
Step 5: Shape into Snowflake
Once your dough has risen, punch it down (yes, really!) to release the air. Now, here comes the fun part – shaping it into a snowflake! Roll out the dough into a large circle and then cut out strips to form the snowflake shape. You want it to look pretty but also be functional, so don’t stress too much about perfection.
Step 6: Second Rise
After shaping, let your snowflake dough rise again for another 30 minutes. Cover it with a towel and let it do its thing. This second rise is so important for that fluffy texture, so just relax and let it puff up!
Step 7: Baking
Preheat your oven to 375°F (190°C) while your dough is rising. When the time is up, pop your snowflake bread in the oven and bake for 25-30 minutes, or until it’s golden brown. You’ll know it’s done when the kitchen smells heavenly, and it sounds hollow when tapped on the bottom. Yum!
Step 8: Garnish and Serve
As soon as it comes out of the oven, sprinkle some fresh parsley on top for that gorgeous pop of color! Let it cool slightly before tearing off a piece – it’s best served warm. Enjoy it with soups, salads, or just on its own. Trust me, your taste buds will thank you!
Why You’ll Love This Recipe
- Easy to make with simple ingredients
- Rich garlic and parmesan flavor that’s irresistible
- Unique snowflake shape adds a fun touch to any meal
- Perfect for sharing at gatherings or cozy dinners
- Versatile enough to pair with soups, salads, or enjoy alone
Tips for Success
Alright, let’s make sure your Garlic Parmesan Snowflake Bread turns out perfectly! Here are some tips that I’ve picked up along the way:
- Check Your Yeast: Always make sure your yeast is fresh! If it doesn’t bubble and froth during activation, it might be expired, and your dough won’t rise.
- Temperature Matters: Keep an eye on your warm water. Too hot can kill the yeast, while too cold won’t activate it properly. Aim for that cozy warm feeling!
- Knead It Right: Don’t rush the kneading process. Kneading helps develop gluten, which is key for a nice texture. If the dough feels too sticky, sprinkle in a little more flour as needed.
- Perfect Rising Environment: Find a warm, draft-free spot for your dough to rise. If your kitchen is chilly, try placing it in the oven (turned off, of course) with the light on to create a warm atmosphere.
- Mind the Timing: Be patient during both rises! Each rise is crucial for achieving that fluffy, airy texture. If you rush it, you might end up with a denser bread.
- Baking Check: Every oven is a little different, so start checking your bread a few minutes early. Look for that golden brown color and a hollow sound when you tap the bottom.
- Serve Fresh: This bread is at its best when served warm. If you’re not serving it right away, wrap it in a cloth to keep it cozy until mealtime!
With these tips, you’ll be well on your way to making a stunning loaf that’s full of flavor and sure to impress!
Nutritional Information
Here’s the estimated nutritional breakdown for each slice of your delicious Garlic Parmesan Snowflake Bread. Keep in mind these values are approximate and can vary based on the ingredients you use.
- Serving Size: 1 slice
- Calories: 150
- Sugar: 0g
- Sodium: 200mg
- Fat: 5g
- Saturated Fat: 1g
- Unsaturated Fat: 4g
- Trans Fat: 0g
- Carbohydrates: 22g
- Fiber: 1g
- Protein: 5g
- Cholesterol: 5mg
So, whether you’re enjoying this bread on its own or pairing it with your favorite meals, you can feel good about indulging in this garlicky, cheesy delight!
FAQ Section
Can I use whole wheat flour instead of all-purpose flour?
Absolutely! Whole wheat flour will give your Garlic Parmesan Snowflake Bread a nuttier flavor and a bit more fiber. Just keep in mind that it may result in a denser loaf, so you might need to adjust the liquid slightly.
What can I do if my dough doesn’t rise?
If your dough isn’t rising, it could be due to inactive yeast. Make sure to activate your yeast properly and check the temperature of your water. If it’s too hot, it can kill the yeast. If all else fails, you can try moving it to a warmer spot to encourage rising.
Can I make the dough ahead of time?
Yes! You can prepare the dough and let it rise, then punch it down and refrigerate it. Just remember to let it come back to room temperature before shaping it into the snowflake. It can be a great time-saver for busy days!
How should I store leftovers?
To keep your Garlic Parmesan Snowflake Bread fresh, wrap it in plastic wrap or place it in an airtight container. It’ll stay good for a couple of days at room temperature, or you can pop it in the fridge for a longer shelf life!
Can I freeze this bread?
Yes, you can freeze this delicious bread! Wrap it tightly in plastic wrap and then in aluminum foil. It’ll keep in the freezer for up to 2 months. Just thaw it in the fridge overnight before serving, and you can always warm it up in the oven for that fresh-baked taste!
Storage & Reheating Instructions
Alright, let’s talk about keeping that delicious Garlic Parmesan Snowflake Bread fresh and ready for you to enjoy! When you have leftovers (if there are any, because it’s so good!), you’ll want to store them properly to maintain that wonderful flavor and texture.
To store, simply wrap your bread tightly in plastic wrap or place it in an airtight container. It’ll keep well at room temperature for about 2 days, or you can refrigerate it for up to a week. Just remember, refrigeration can sometimes dry it out a bit, so try to consume it sooner rather than later!
If you want to keep it for a longer period, freezing is a fantastic option! Wrap the bread tightly in plastic wrap, followed by a layer of aluminum foil to prevent freezer burn. It’ll stay good in the freezer for up to 2 months. When you’re ready to enjoy it again, just thaw it overnight in the fridge.
Now, for reheating, if you want that fresh-baked goodness back, preheat your oven to 350°F (175°C). Place the bread directly on the oven rack or on a baking sheet for about 10-15 minutes until warmed through. If it’s frozen, give it a bit more time. The goal is to warm it up without drying it out. You can even spritz a little water on it before wrapping in foil to keep it moist!
And there you have it! With these storage and reheating tips, you can enjoy your Garlic Parmesan Snowflake Bread even longer. Happy snacking!
Print
Garlic Parmesan Snowflake Bread Recipe to Delight You
- Total Time: 1 hour 45 minutes
- Yield: 1 loaf 1x
- Diet: Vegetarian
Description
A delightful bread recipe infused with garlic and parmesan flavor.
Ingredients
- 2 cups all-purpose flour
- 1 packet (2 1/4 tsp) active dry yeast
- 1 teaspoon sugar
- 1 teaspoon salt
- 3/4 cup warm water
- 2 tablespoons olive oil
- 4 cloves garlic, minced
- 1/2 cup grated parmesan cheese
- 1 tablespoon fresh parsley, chopped
Instructions
- In a bowl, mix warm water, sugar, and yeast. Let it sit for 5 minutes.
- Add flour, salt, olive oil, garlic, and parmesan cheese to the yeast mixture.
- Knead the dough for about 8 minutes until smooth.
- Place dough in a greased bowl, cover, and let it rise for 1 hour.
- Punch down the dough and shape it into a snowflake shape on a baking sheet.
- Let it rise for another 30 minutes.
- Bake at 375°F (190°C) for 25-30 minutes until golden brown.
- Sprinkle with fresh parsley before serving.
Notes
- Serve warm for best flavor.
- Store leftovers in an airtight container.
- This bread pairs well with soups and salads.
- Prep Time: 15 minutes
- Cook Time: 30 minutes
- Category: Bread
- Method: Baking
- Cuisine: Italian
Nutrition
- Serving Size: 1 slice
- Calories: 150
- Sugar: 0g
- Sodium: 200mg
- Fat: 5g
- Saturated Fat: 1g
- Unsaturated Fat: 4g
- Trans Fat: 0g
- Carbohydrates: 22g
- Fiber: 1g
- Protein: 5g
- Cholesterol: 5mg
Keywords: Garlic Parmesan Snowflake Bread Recipe