
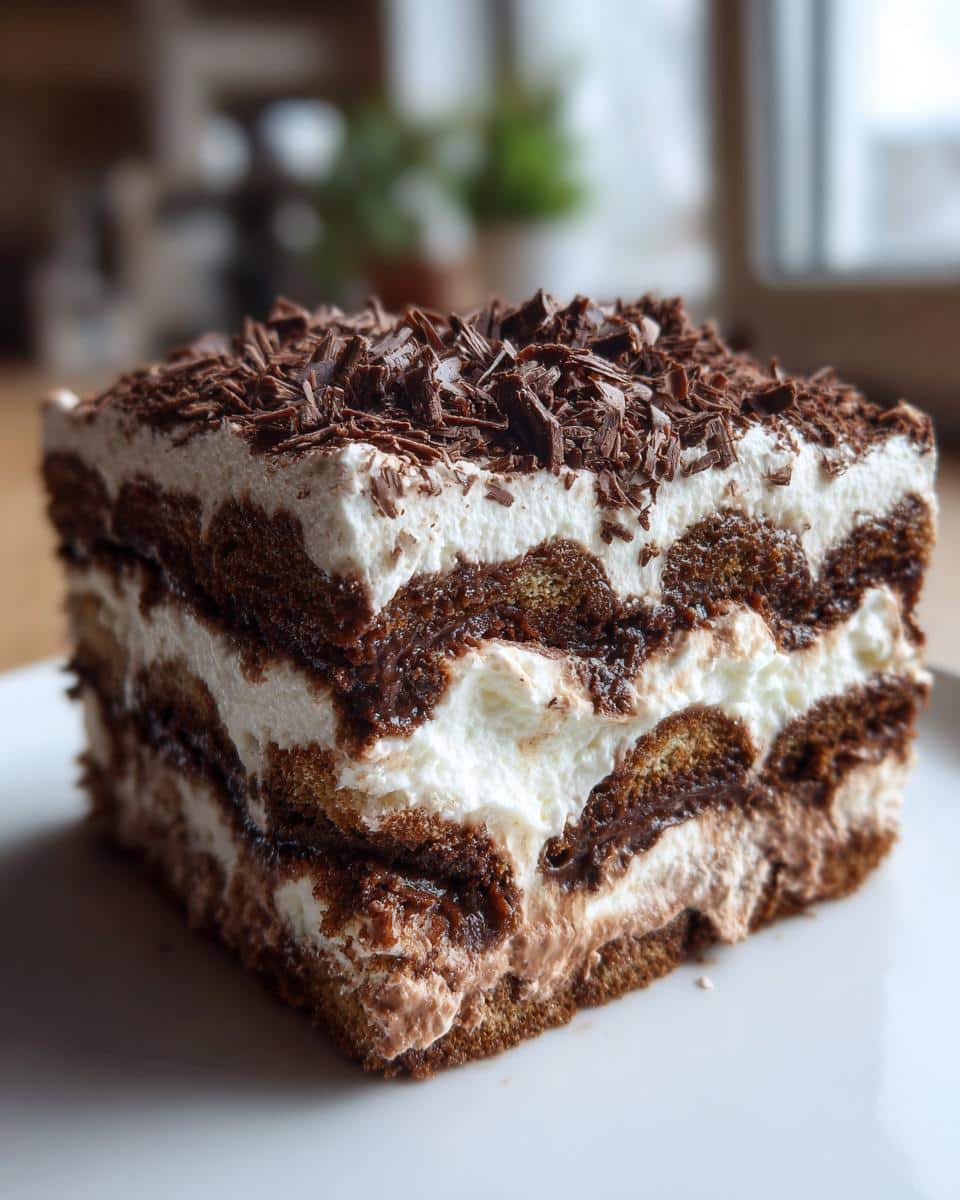
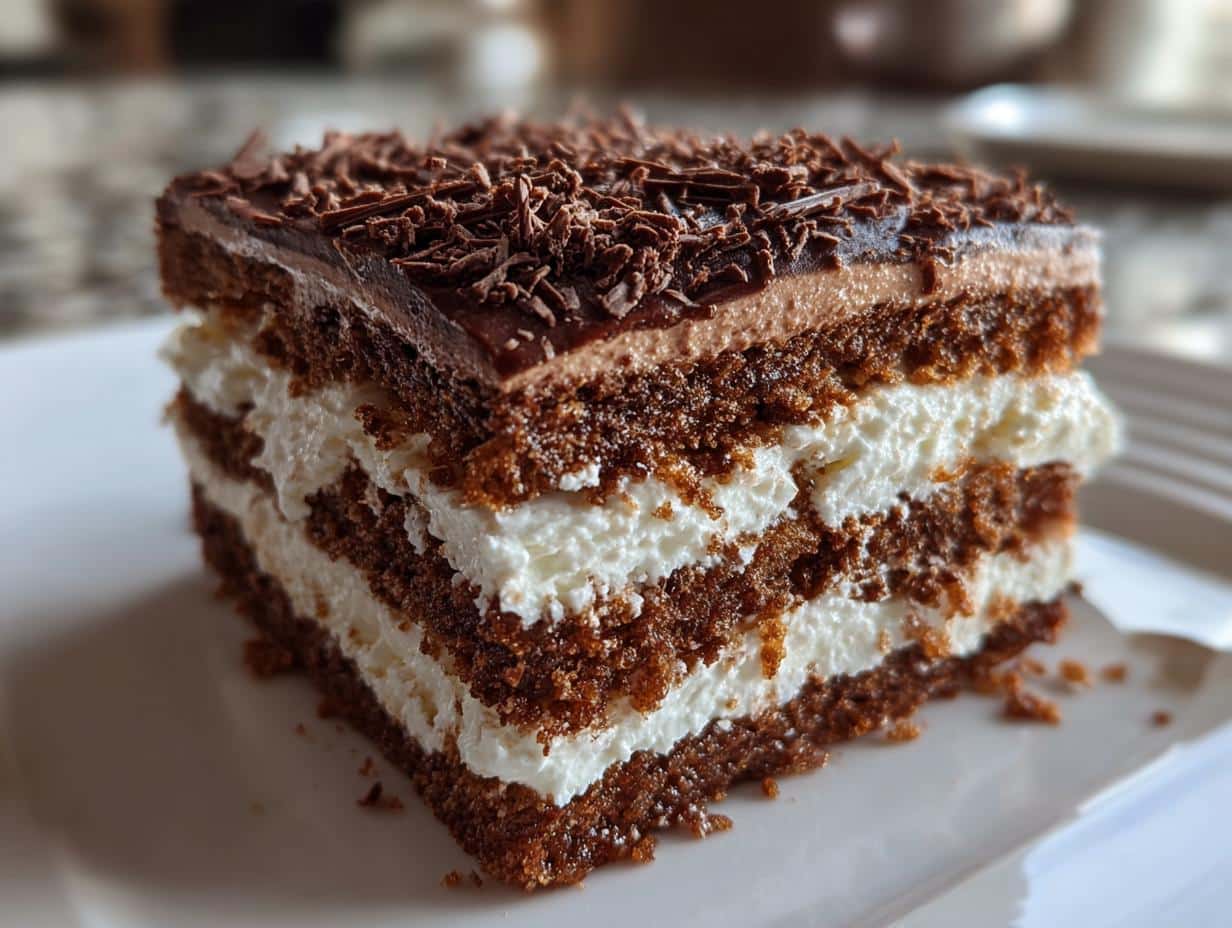
Oh my goodness, let me tell you about my absolute favorite indulgence: Chocolate Ripple Cake! This delightful dessert is a layered dream of rich chocolate and luscious cream that just melts in your mouth. I still remember the first time I tasted it at a friend’s birthday party. I was instantly hooked! The way those chocolate biscuits soak up the cream and the cocoa makes each bite a heavenly experience. Plus, it’s a no-bake wonder, which means less time fussing in the kitchen and more time enjoying the sweet life! Trust me, once you dive into this chocolatey goodness, you’ll be coming back for seconds (and maybe thirds!).
Ingredients List
- 200g chocolate biscuits
- 500ml heavy cream
- 2 tablespoons cocoa powder
- 2 tablespoons sugar
- 1 teaspoon vanilla extract
- 100g dark chocolate, grated
How to Prepare the Chocolate Ripple Cake
Making the Chocolate Ripple Cake is a breeze, and I promise you’ll love how simple it is! Just follow these steps, and you’ll have a stunning dessert ready to impress anyone. Let’s get started!
Step-by-Step Instructions
- First things first, grab a mixing bowl and beat the 500ml heavy cream, 2 tablespoons sugar, 2 tablespoons cocoa powder, and 1 teaspoon vanilla extract together. You want to whip this until soft peaks form. It usually takes about 3-5 minutes with an electric mixer, but don’t walk away—you wanna keep an eye on it!
- While that’s happening, pour some milk into a shallow dish. You’ll need this for dipping. Now, take each of your 200g chocolate biscuits and dip them in the milk for just a second—too long, and they’ll get mushy!
- Next, start layering those dipped biscuits on a serving platter. I like to create a nice even layer, but don’t stress if they’re not perfect. Each layer of biscuits will be covered with that dreamy whipped cream mixture.
- Once you’ve got your first layer of biscuits down, spoon a generous layer of the whipped cream mixture on top. Make sure to spread it out evenly so every bite is delicious!
- Repeat this process: layer of biscuits, then cream, until you’ve used up all your ingredients. Just make sure to finish with a luscious layer of cream on top—this is where it really shines!
- Finally, sprinkle the 100g grated dark chocolate over the top for that extra touch of elegance and flavor. Wow!
- Now comes the hard part—refrigerate your masterpiece for at least 4 hours, but if you can wait overnight, that’s even better! This allows the biscuits to soak up all that creamy goodness and really meld together.
And there you have it! Your Chocolate Ripple Cake is ready to be enjoyed. Trust me, the wait will be worth it when you cut into those beautiful layers of chocolate and cream!
Why You’ll Love This Recipe
- No-bake magic: You don’t have to turn on the oven! This cake is perfect for warm days when you want something sweet without heating up the kitchen.
- Super easy to make: With just a few simple steps, anyone can whip this up, even if you’re a kitchen newbie!
- Indulgent flavor: The combination of chocolate and cream is a match made in heaven, creating a rich and satisfying dessert that’s hard to resist.
- Perfect for sharing: This recipe yields 8 generous servings, making it ideal for gatherings, parties, or just a cozy night in with friends and family.
- Make it ahead: You can prepare this cake in advance and let it chill, freeing up your time for other things. Plus, it tastes even better after a night in the fridge!
- Customizable: Feel free to play around with different biscuits or add flavors like coffee for an extra kick—this recipe is as flexible as it is delicious!
Tips for Success
Okay, let’s make sure your Chocolate Ripple Cake turns out absolutely fabulous! Here are my top tips for success that I’ve picked up along the way:
- Whip it right: When you’re whipping the heavy cream, watch it closely! If you overbeat, you might end up with butter instead of soft peaks. Aim for that light, fluffy texture.
- Choose your biscuits wisely: You can use any chocolate biscuits you love, but I find that ones that are a bit thicker hold up better when dipped. Experiment with your favorites!
- Adjust the sweetness: If you prefer a sweeter cake, feel free to add a little more sugar to the cream mixture. Just taste as you go; it’s all about what makes your taste buds happy!
- Milk dipping method: Don’t soak the biscuits for too long! A quick dip is all it takes to get them just soft enough to absorb the cream while maintaining a bit of crunch.
- Chill out: Patience is key! The longer you refrigerate the cake, the better the flavors meld together. If you can wait overnight, do it—it’s totally worth it!
- Decorate your way: Don’t hold back on the toppings! Besides grated chocolate, you can add fresh berries or a drizzle of caramel for an extra touch of decadence.
- Layer it up: Make sure to spread the cream mixture evenly between the layers. This ensures that every slice has that perfect balance of chocolate and cream!
With these tips in your back pocket, you’re all set to create a Chocolate Ripple Cake that will wow everyone. Enjoy the process, and most importantly, have fun!
Variations of Chocolate Ripple Cake
Feeling adventurous? Let’s take your Chocolate Ripple Cake to the next level with some fun variations! This dessert is so versatile, and you can easily switch things up to suit your taste or mood. Here are a few ideas to get those creative juices flowing:
- Mocha Delight: Add a shot of espresso or a tablespoon of instant coffee to your cream mixture for a rich coffee flavor that pairs beautifully with the chocolate. It’s like a dessert and a caffeine boost all in one!
- Nutty Crunch: Fold in some chopped nuts like hazelnuts or almonds into the whipped cream for added texture and flavor. The crunch will complement the softness of the cream and biscuits perfectly!
- Fruit Infusion: Layer in some fresh berries like raspberries or strawberries between the biscuits and cream. The tartness of the fruit adds a refreshing contrast to the rich chocolate.
- Minty Fresh: Mix in a few drops of peppermint extract to the cream for a refreshing mint twist. Top with crushed mint candies or chocolate mint biscuits and watch it become a dessert favorite!
- Spiced Up: Add a pinch of cinnamon or a hint of chili powder to the whipped cream for a warm, spicy kick. It’s a unique twist that will surprise your taste buds in the best way!
- Cookie Swap: Experiment with different types of biscuits! Try using ginger snaps for a spicy twist or even vanilla wafers for a lighter flavor. Each type brings its own personality to the cake!
With these variations, you can customize your Chocolate Ripple Cake to fit any occasion or craving. So don’t be afraid to get creative and make it your own—each version is sure to be a hit!
Storage & Reheating Instructions
Once you’ve whipped up your Chocolate Ripple Cake, you might find it hard to resist digging in right away—but if you do have leftovers (which is rare!), here’s how to store them properly to keep that deliciousness intact!
First off, make sure to cover the cake tightly with plastic wrap or transfer it to an airtight container. This will help prevent it from absorbing any fridge odors and keep it fresh for longer. You can store it in the refrigerator for up to 3-4 days—if it lasts that long!
Now, if you’re wondering about reheating, here’s the scoop: this cake is best enjoyed cold, so there’s no need to heat it up! Just slice it straight from the fridge, and let those layers of chocolatey goodness shine. If you really want to warm it up, you can let it sit at room temperature for about 15-20 minutes before serving, but trust me, it’s perfect as is!
So go ahead, store those leftovers (if you have any) and enjoy your Chocolate Ripple Cake over the next few days. Each bite will remind you of the sweet joy you created!
Nutritional Information
Now, I know how important it is to keep an eye on what we’re munching on, so here’s a little info about the nutritional values of this Chocolate Ripple Cake. Keep in mind that these values can vary based on the specific brands and ingredients you choose, so they’re not set in stone. However, here’s what you can typically expect per slice:
- Calories: 350
- Fat: 25g
- Saturated Fat: 15g
- Unsaturated Fat: 5g
- Trans Fat: 0g
- Carbohydrates: 30g
- Fiber: 2g
- Protein: 4g
- Sugar: 20g
- Sodium: 50mg
- Cholesterol: 70mg
So, whether you’re enjoying it as a special treat or sharing it with loved ones, you can feel a little better knowing what’s in each delightful slice. Just remember, moderation is key, and the joy of this dessert is worth every bite!
FAQ Section
Got questions about the Chocolate Ripple Cake? Don’t worry, I’ve got you covered! Here are some common queries I get, along with the answers to help you whip up this delicious dessert with confidence.
Can I use a different type of biscuit?
Absolutely! While chocolate biscuits are classic, you can switch things up with any of your favorite cookies. Try using bourbon biscuits for a hint of flavor or even vanilla wafers for a lighter touch. Just keep in mind that different biscuits may soak up the cream differently!
How can I adjust the sweetness?
If you like your desserts on the sweeter side, feel free to add a bit more sugar to the whipped cream mixture. Just taste as you go! You can also consider using sweetened whipped cream if you’re really craving that sugar rush.
Can I make it gluten-free?
Yes! Just look for gluten-free chocolate biscuits, which are widely available these days. They work just as well, and you won’t miss a beat in flavor or texture!
How long can I store leftovers?
You can store your Chocolate Ripple Cake in the fridge for about 3-4 days. Just make sure to cover it tightly to keep it fresh. But let’s be real—you might not have any leftovers!
Can I add fruit to the layers?
Absolutely! Fresh berries like strawberries or raspberries add a wonderful burst of flavor and a beautiful contrast to the chocolatey layers. Just layer them in between the biscuits and cream—yum!
What if I want to make it a little healthier?
You can use lighter cream or even Greek yogurt in place of some of the heavy cream to cut down on fat. Just keep in mind that it might change the texture a bit, but it’ll still taste delicious!
Can I freeze the Chocolate Ripple Cake?
While it’s best enjoyed fresh, you can freeze it if you have leftovers. Just cover it well with plastic wrap and then foil. To serve, let it thaw in the fridge overnight. It might lose a bit of texture, but it’ll still be tasty!
I hope these answers help clear up any questions you might have and inspire you to get into the kitchen and make this delectable dessert! Enjoy every layer of chocolatey goodness!
Print
Chocolate Ripple Cake: 7 Heavenly Layers to Indulge
- Total Time: 4 hours 30 minutes
- Yield: 8 servings 1x
- Diet: Vegetarian
Description
A delightful dessert with layers of chocolate and cream.
Ingredients
- 200g chocolate biscuits
- 500ml heavy cream
- 2 tablespoons cocoa powder
- 2 tablespoons sugar
- 1 teaspoon vanilla extract
- 100g dark chocolate, grated
Instructions
- Beat the heavy cream, sugar, cocoa powder, and vanilla extract until soft peaks form.
- Dip each chocolate biscuit in milk briefly.
- Layer the dipped biscuits on a serving platter.
- Spread a layer of the whipped cream mixture over the biscuits.
- Repeat the layers until all ingredients are used, finishing with cream on top.
- Sprinkle grated dark chocolate on top.
- Refrigerate for at least 4 hours, preferably overnight.
Notes
- Use any chocolate biscuits you prefer.
- Adjust sugar based on your taste.
- For extra flavor, add coffee to the cream mixture.
- Prep Time: 30 minutes
- Cook Time: 0 minutes
- Category: Dessert
- Method: No-bake
- Cuisine: Australian
Nutrition
- Serving Size: 1 slice
- Calories: 350
- Sugar: 20g
- Sodium: 50mg
- Fat: 25g
- Saturated Fat: 15g
- Unsaturated Fat: 5g
- Trans Fat: 0g
- Carbohydrates: 30g
- Fiber: 2g
- Protein: 4g
- Cholesterol: 70mg
Keywords: Chocolate Ripple Cake