
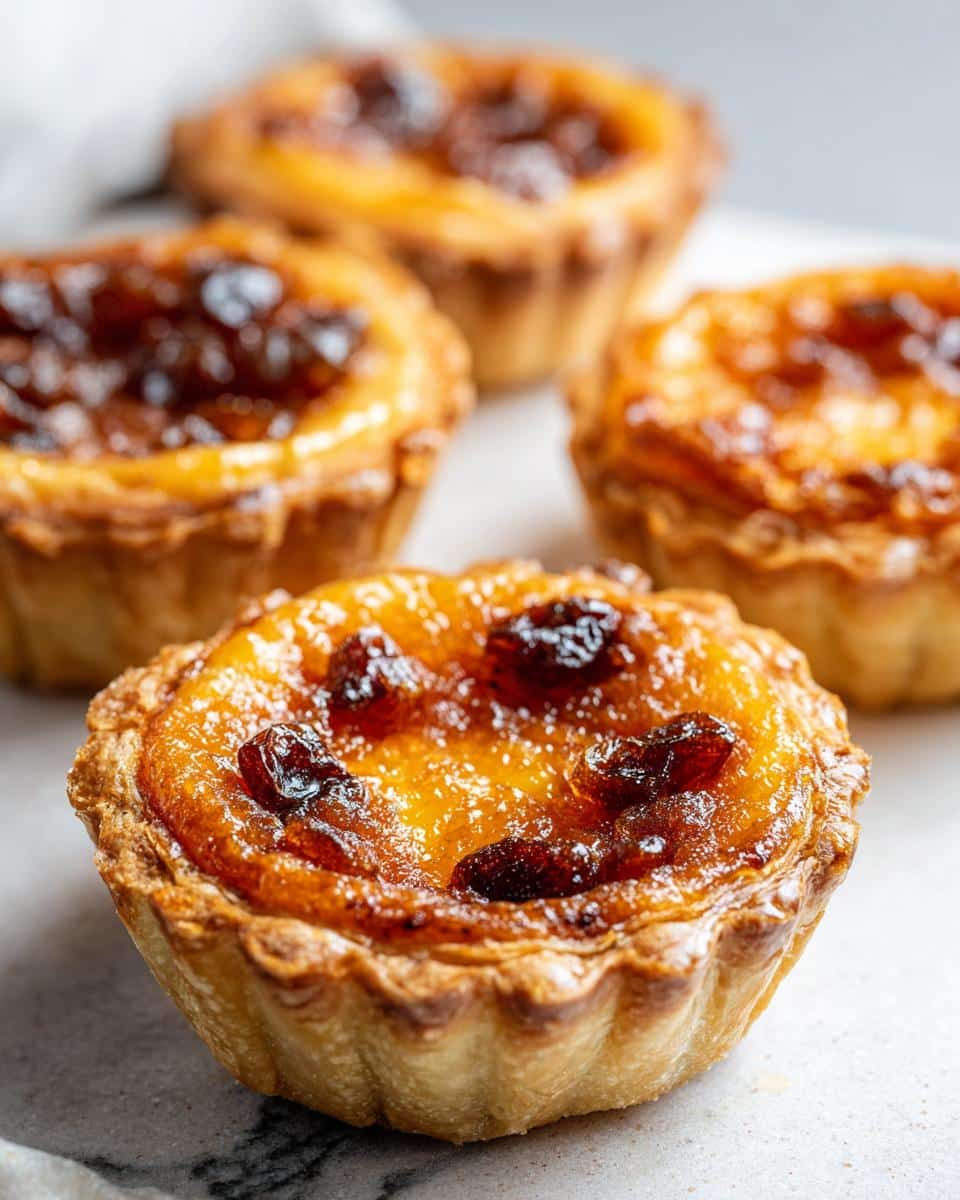
Ah, butter tarts! They’re one of those desserts that immediately transport me back to my childhood, hanging out in my grandma’s kitchen in Canada. The smell of sweet, buttery goodness wafting through the air as she pulled the tarts from the oven is a memory I cherish. This classic Canadian dessert is not just a treat; it’s a piece of my heritage. Trust me, once you try my Butter Tarts Recipe, you’ll understand why they hold a special place in the hearts of so many. The flaky pastry, combined with that rich, gooey filling, creates a perfectly delightful bite that’s just the right amount of sweet. Whether you’re hosting a gathering, celebrating a special occasion, or simply indulging on a cozy night in, these tarts are sure to impress and satisfy. So, let’s roll up our sleeves and dive into the magic of making these buttery delights!
Ingredients for Butter Tarts Recipe
Gathering your ingredients is the first step to crafting these delightful tarts! Here’s what you’ll need:
- 1 1/2 cups all-purpose flour: This is the foundation for your flaky pastry. Make sure it’s fresh for the best texture!
- 1/2 cup unsalted butter, chilled and cubed: Cold butter is key for that melt-in-your-mouth pastry. Don’t skimp on quality here!
- 1/4 cup granulated sugar: Just a touch to sweeten the crust and balance things out.
- 1/4 teaspoon salt: This enhances all the flavors, so don’t leave it out!
- 3-4 tablespoons cold water: This helps bind your dough together. Start with 3 tablespoons and add more if needed.
- 1 cup brown sugar, packed: The star of the filling! It gives that deep, rich sweetness.
- 1/2 cup corn syrup: This adds that luscious gooeyness that’s so iconic in butter tarts.
- 1/4 cup unsalted butter, melted: For the filling, this brings a buttery richness that’s irresistible.
- 2 large eggs: They help set the filling perfectly—trust me, they’re essential!
- 1 teaspoon vanilla extract: A splash of this adds warmth and depth to the flavor.
- 1/2 cup raisins or walnuts (optional): Add these based on your preference! They give a lovely texture and additional sweetness.
Once you have everything ready, you’re well on your way to making some of the best butter tarts you’ve ever tasted! Enjoy the process; it’s all part of the fun!
How to Prepare the Butter Tarts Recipe

Now, let’s get our hands doughy and jump into the preparation of these heavenly butter tarts! I promise, it’s easier than it sounds. Follow these steps, and you’ll have a batch of buttery goodness ready in no time!
- Preheat your oven: Set it to 350°F (175°C) so it’s nice and hot when your tarts are ready to bake. This is crucial for that perfect golden crust!
- Make the pastry: In a large mixing bowl, combine the flour, sugar, and salt. It’s a simple mix, but make sure it’s well blended for an even crust.
- Add the butter: Toss in your chilled, cubed butter. Using a pastry cutter or your fingers, mix until the mixture resembles coarse crumbs. This step is super fun—don’t be shy!
- Bring it together: Gradually add the cold water, starting with 3 tablespoons. Mix gently until the dough just comes together. If it feels too dry, add a little more water, but be careful not to overwork it. We want flaky, not tough!
- Roll out the dough: On a lightly floured surface, roll out the dough to about 1/8-inch thick. Use a round cutter to cut circles that will fit your muffin tin. I love using a glass or a cookie cutter for this!
- Fit into the muffin tin: Gently press each circle into the muffin tin, making sure to cover the bottom and sides well. This is where your tarts will take shape, so make them cozy!
- Prepare the filling: In a separate bowl, whisk together the brown sugar, corn syrup, melted butter, eggs, and vanilla until smooth. The mixture should be nice and creamy—it smells heavenly!
- Fill the pastry: Pour the filling into each pastry shell, filling them about 3/4 full. If you’re adding raisins or walnuts, sprinkle them on top now. They’ll add a delightful surprise!
- Bake: Pop those beauties into the preheated oven and bake for 20-25 minutes. Keep an eye on them; you want the edges to be golden brown, and the filling should be set but still a little wobbly in the center.
- Cool and serve: Once baked, remove the tarts from the oven and let them cool in the tin for a few minutes. Then, carefully transfer them to a wire rack to cool completely. Trust me, the waiting is worth it!
And there you have it! The process is straightforward, and I can already smell the buttery goodness wafting through your kitchen. Enjoy the thrill of making these delightful treats!
Why You’ll Love This Butter Tarts Recipe
Let me tell you, there are so many reasons to adore this Butter Tarts Recipe! Here are just a few that come to mind:
- Quick prep time: You can whip these up in about 20 minutes, which means you won’t be spending your entire day in the kitchen!
- Classic flavor: With that sweet, buttery filling and flaky crust, it’s a taste of home and nostalgia in every bite.
- Easy to make: Seriously, if I can do it, you can too! The steps are straightforward, making it perfect for both beginners and seasoned bakers.
- Customizable: You can play around with the filling by adding your favorite nuts or dried fruits. Make it your own!
- Perfect for sharing: These tarts are a hit at gatherings, and they’re the kind of treat that brings people together. Everyone will be asking for seconds!
- Comfort food: There’s something so comforting about a warm butter tart. It’s the perfect little indulgence for those cozy nights in.
So, whether you’re making them for a special occasion or just because, I promise you’ll fall in love with these buttery delights just like I have!
Tips for Success with Butter Tarts Recipe
Alright, let’s make sure your butter tarts turn out absolutely perfect! Here are my go-to tips that I’ve picked up over the years, and I can’t wait to share them with you:
- Keep everything cold: Chilled butter and cold water are crucial for a flaky crust. If your kitchen is warm, you might even want to chill your mixing bowl for a bit. Trust me, it makes a difference!
- Don’t overwork the dough: When mixing the pastry, stop as soon as it comes together. Overworking it can lead to tough tarts, and nobody wants that! Just a gentle touch is all you need.
- Let the filling cool: If you’ve just melted your butter for the filling, let it cool slightly before mixing it with the eggs. This prevents the eggs from scrambling and helps achieve that smooth, creamy texture.
- Fill with care: When pouring the filling into the pastry shells, aim for about 3/4 full. This allows room for the filling to puff slightly without overflowing. Nobody wants a messy oven cleanup!
- Check for doneness: The tarts are done when the edges are golden brown and the filling is set with just a slight wobble in the center. If they look too jiggly, give them a few more minutes. Patience pays off here!
- Let them cool: Allow the tarts to cool in the pan for a bit before transferring them to a wire rack. This helps them set up and makes removing them much easier.
- Experiment with fillings: Don’t be afraid to get creative! Add chocolate chips, coconut, or even a splash of bourbon to the filling for a unique twist. It’s all about making these tarts your own!
With these tips in your back pocket, you’re all set to create butter tarts that are not only delicious but also made with love and care. Happy baking!
Variations on the Butter Tarts Recipe
Now, if you’re anything like me, you love to play around with recipes to make them your own! These butter tarts are incredibly versatile, and I’m excited to share some fun variations that you can try out. Here are a few ideas to get your creative juices flowing:
- Chocolate Lovers: Add a handful of chocolate chips or chunks to the filling. The rich chocolate melting into the buttery goodness is something you won’t want to miss!
- Coconut Delight: Stir in some shredded coconut for a tropical twist. It adds a lovely chewiness that complements the creamy filling beautifully.
- Maple Cream: Swap out the corn syrup for pure maple syrup for a different flavor profile. It gives the tarts a lovely, distinct sweetness that’s oh-so-Canadian!
- Nutty Goodness: Instead of raisins, try incorporating chopped pecans or almonds. They add a nice crunch and a depth of flavor that pairs perfectly with the sweet filling.
- Spiced Pumpkin: For a seasonal delight, mix in some pumpkin puree and a dash of cinnamon or nutmeg to the filling. It’s like a cozy fall hug in a tart!
- Bourbon Kick: Add a splash of bourbon to the filling for an adult twist. It gives a warm, complex flavor that’s just perfect for gatherings with friends!
- Fruit Infusion: Toss in some diced apples or pears for a fruity surprise. They’ll soften up while baking and add a fresh burst to every bite.
These variations are not just about altering flavors; they’re a fun way to express your personality in the kitchen. So, feel free to experiment and let your taste buds guide you on this delicious journey! Happy baking, and enjoy discovering your favorite twist on this classic butter tart recipe!
Nutritional Information for Butter Tarts Recipe
As you indulge in these delightful butter tarts, it’s always good to know what you’re enjoying! Here’s the estimated nutritional information per serving, which is one tart:
- Calories: 180
- Fat: 8g
- Saturated Fat: 4g
- Unsaturated Fat: 3g
- Trans Fat: 0g
- Carbohydrates: 25g
- Sugar: 10g
- Fiber: 1g
- Protein: 2g
- Cholesterol: 30mg
- Sodium: 50mg
Keep in mind that these values are estimates and can vary based on ingredient brands and any variations you might add. So, while you’re enjoying these sweet treats, you can feel good knowing a little about what’s inside them. Happy indulging!
FAQ About Butter Tarts Recipe
I’m so glad you’re diving into the world of butter tarts! I know you might have a few questions, so let’s clear up some common inquiries about this beloved recipe:
Can I make the pastry dough ahead of time?
Absolutely! You can prepare the dough in advance and store it in the refrigerator for up to 2 days. Just wrap it tightly in plastic wrap. When you’re ready to use it, let it sit at room temperature for about 10-15 minutes before rolling it out. This makes it easier to work with!
What if I don’t have corn syrup?
No worries! You can substitute corn syrup with an equal amount of golden syrup or even maple syrup for a different flavor. Each option brings its own unique twist to the tarts, so feel free to experiment!
Can I freeze butter tarts?
Yes, you can! Once they’re completely cooled, wrap each tart individually in plastic wrap and place them in an airtight container. They can be frozen for up to 2 months. To enjoy, just thaw them in the fridge overnight and they’ll be ready to delight your taste buds!
How do I know when my butter tarts are done?
Great question! Your tarts are done when the edges are golden brown and the filling is set with just a slight jiggle in the center. If they’re still very wobbly, give them a few more minutes in the oven. Remember, they will continue to set as they cool!
Can I make mini butter tarts instead?
Definitely! Just use a mini muffin tin instead of a regular one. The baking time will be shorter, so keep an eye on them—about 15-18 minutes should do the trick. Mini tarts are adorable and perfect for sharing at parties!
I hope these answers help you feel more confident as you whip up your own batch of butter tarts. Enjoy the process, and remember, every tart is made with love! Happy baking!
Storage & Reheating Instructions for Butter Tarts Recipe
Once you’ve enjoyed these delicious butter tarts, you might find yourself with a few leftovers. Don’t worry; they store beautifully and can be enjoyed later! Here’s how to keep them fresh and tasty:
- Storing: Place any leftover butter tarts in an airtight container. You can keep them at room temperature for up to 2 days. If you want to prolong their life, refrigerate them, and they’ll stay good for about a week. Just be sure to cover them well to maintain their delightful texture!
- Freezing: These tarts freeze wonderfully! To do this, let them cool completely, then wrap each tart individually in plastic wrap and place them in a freezer-safe container. They can be frozen for up to 2 months. Just remember to label the container so you know what deliciousness awaits!
When you’re ready to enjoy them again, here’s the best way to reheat:
- Thawing: If frozen, remove the tarts from the freezer and let them thaw in the refrigerator overnight. This helps them retain their moisture and flavor.
- Reheating: To warm them up, preheat your oven to 350°F (175°C). Place the tarts on a baking sheet and heat for about 10-15 minutes, or until they’re warmed through. This will help restore that lovely flaky texture and bring back the gooey filling!
And there you have it! With these storage and reheating tips, you can savor the sweet, buttery goodness of your homemade butter tarts long after they come out of the oven. Enjoy every last bite!
Print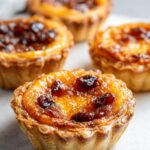
Butter Tarts Recipe: 7 Sweet Reasons You’ll Love This Dessert
- Total Time: 45 minutes
- Yield: 12 tarts 1x
- Diet: Vegetarian
Description
A classic Canadian dessert featuring a flaky pastry filled with a sweet, buttery filling.
Ingredients
- 1 1/2 cups all-purpose flour
- 1/2 cup unsalted butter, chilled and cubed
- 1/4 cup granulated sugar
- 1/4 teaspoon salt
- 3–4 tablespoons cold water
- 1 cup brown sugar, packed
- 1/2 cup corn syrup
- 1/4 cup unsalted butter, melted
- 2 large eggs
- 1 teaspoon vanilla extract
- 1/2 cup raisins or walnuts (optional)
Instructions
- Preheat the oven to 350°F (175°C).
- In a bowl, combine flour, sugar, and salt.
- Add chilled butter and mix until crumbly.
- Stir in cold water until dough forms.
- Roll out the dough and cut into circles to fit a muffin tin.
- In another bowl, mix brown sugar, corn syrup, melted butter, eggs, and vanilla until smooth.
- Place dough in muffin tin and fill with the sugar mixture.
- If desired, add raisins or walnuts to each tart.
- Bake for 20-25 minutes or until the filling is set and edges are golden.
- Let cool before serving.
Notes
- Use a food processor for quick dough preparation.
- Store leftovers in an airtight container.
- Adjust sweetness by adding more or less sugar.
- Prep Time: 20 minutes
- Cook Time: 25 minutes
- Category: Dessert
- Method: Baking
- Cuisine: Canadian
Nutrition
- Serving Size: 1 tart
- Calories: 180
- Sugar: 10g
- Sodium: 50mg
- Fat: 8g
- Saturated Fat: 4g
- Unsaturated Fat: 3g
- Trans Fat: 0g
- Carbohydrates: 25g
- Fiber: 1g
- Protein: 2g
- Cholesterol: 30mg
Keywords: Butter Tarts Recipe, Canadian Dessert, Sweet Pastry