
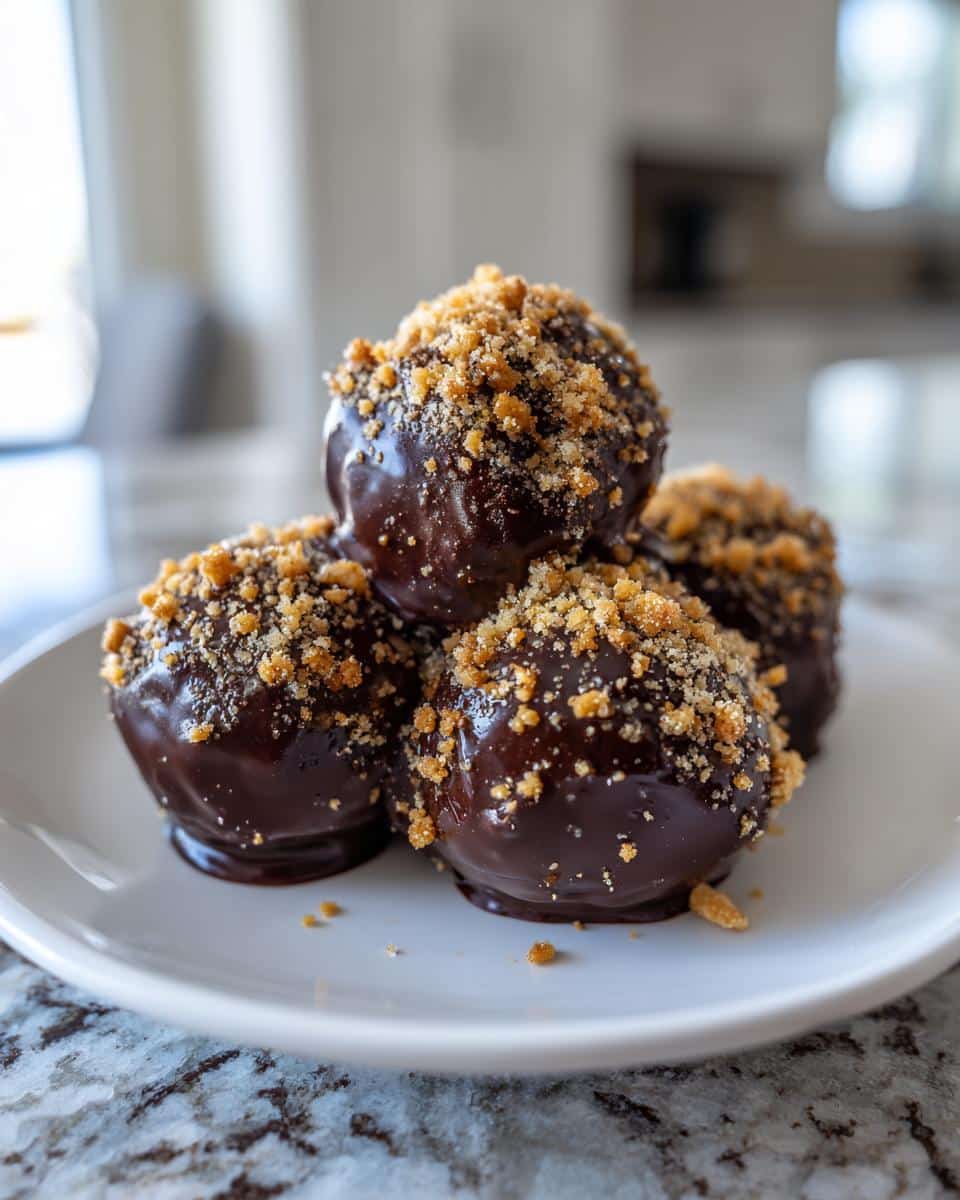
Oh my goodness, let me tell you about my absolute favorite treat: No Bake Butterfinger Balls! Seriously, if you’re looking for a dessert that’s not only easy to whip up but also tastes like a dream, you’ve hit the jackpot. Imagine the rich, creamy flavor of peanut butter perfectly mingling with the crunch of graham crackers, all enrobed in luscious chocolate. It’s like biting into a Butterfinger candy bar, but homemade and way more fun to make! Plus, there’s no oven required, which means you can have these little bites of joy ready in no time. Trust me, once you try these, they’ll become your go-to sweet fix for any occasion!
Ingredients List
Before we dive into the fun part of making these No Bake Butterfinger Balls, let’s gather our ingredients! You’ll want to have everything ready to go so the process flows smoothly. Here’s what you need:
- 1 cup creamy peanut butter
- 2 cups crushed graham crackers
- 1 cup powdered sugar
- 1 cup chocolate chips
- 2 tablespoons coconut oil
Make sure to measure everything out accurately—trust me, it makes a difference! I like to lay everything out on the counter before I start; it keeps me organized and makes the whole experience feel more fun. Let’s get ready to create some deliciousness!
How to Prepare No Bake Butterfinger Balls
Getting started on these No Bake Butterfinger Balls is a breeze! Just follow these simple steps, and you’ll be indulging in these delicious treats in no time. Let’s get that peanut butter and chocolate magic happening!
Step 1: Mix the Base
First things first, grab a big mixing bowl and combine that creamy peanut butter, crushed graham crackers, and powdered sugar. I like to use a sturdy spatula to really get in there and mix until everything is well combined. You want a thick, dough-like consistency that holds together nicely. It’s okay to get your hands in there if you need to; it’s all part of the fun!
Step 2: Shape the Balls
Now, it’s time to form the mixture into small balls—about the size of a tablespoon works perfectly! Just scoop a bit of the mixture, roll it in your hands, and place each ball on a baking sheet lined with parchment paper. Make sure to leave some space between each one; they need a little room to breathe as they set up.
Step 3: Melt the Chocolate
Next up, let’s melt that chocolate! In a microwave-safe bowl, combine the chocolate chips and coconut oil. Microwave in short bursts of 20-30 seconds, stirring in between, until everything is smooth and glossy. If you prefer the double boiler method, that works too—just be careful not to let any water get into your chocolate!
Step 4: Dip and Set
Now comes the best part: dipping! Take each ball and gently coat it in the melted chocolate, using a fork to help shake off any excess. Return them to the baking sheet and pop them into the refrigerator for at least 30 minutes. This will help the chocolate set perfectly, giving you that delightful crunch when you take a bite. Trust me, you’ll want to keep a close eye on these while they chill—your kitchen is about to smell incredible!
Nutritional Information
Let’s talk about what’s packed into these delightful No Bake Butterfinger Balls! Each ball is a little powerhouse of flavor and energy, making it a sweet treat you can feel good about enjoying. Here’s a quick breakdown of the nutritional values per serving (one ball):
- Calories: 150
- Fat: 9g
- Saturated Fat: 4g
- Unsaturated Fat: 5g
- Trans Fat: 0g
- Cholesterol: 0mg
- Sodium: 50mg
- Carbohydrates: 15g
- Sugar: 8g
- Fiber: 1g
- Protein: 3g
While they’re definitely a treat, these little bites also offer a good balance of protein and healthy fats thanks to the peanut butter. Perfect for a quick energy boost or satisfying your sweet tooth without going overboard. Enjoy every delicious bite!
Tips for Success
Want to make your No Bake Butterfinger Balls even more irresistible? I’ve got some tips to help you nail this recipe every time! First, for the best texture, make sure your peanut butter is nice and creamy—natural peanut butter can be a bit too oily, so stick with the classic creamy variety. If you want a little extra crunch, consider adding some chopped nuts or toffee bits into the mixture for that fun Butterfinger feel!
Also, don’t rush the melting process for the chocolate. Stirring frequently while melting helps prevent it from seizing up. And, if you find the chocolate gets too thick, just add a splash more coconut oil to keep it smooth. Lastly, let your balls chill longer if you can—this not only helps the chocolate set better but makes them even more delightful to bite into!
Variations of No Bake Butterfinger Balls
Feeling adventurous? There are so many fun ways to customize your No Bake Butterfinger Balls! If you’re not a huge fan of peanut butter or want to try something different, almond butter makes a great substitute. It adds a lovely nutty flavor that pairs perfectly with the chocolate.
Want to jazz things up? Consider rolling your balls in crushed nuts or sprinkles after dipping them in chocolate for an extra crunch and color! You could also mix in some mini chocolate chips or toffee bits into the peanut butter mixture for that signature Butterfinger crunch.
And if you’re looking for a little something extra, try drizzling some melted white chocolate over the top once they’ve set—it’s a beautiful touch that adds even more yumminess. The possibilities are endless, so feel free to get creative and make these treats truly your own!
Storage & Reheating Instructions
Once you’ve enjoyed your No Bake Butterfinger Balls, storing leftovers is super simple! Just pop them in an airtight container and keep them in the refrigerator, where they’ll stay fresh for about a week. Trust me, they’re perfect for grabbing as a quick snack or satisfying that late-night sweet craving!
If you happen to have any left that you want to save for later, you can also freeze them. Just layer them in a freezer-safe container with parchment paper in between each layer to prevent sticking. When you’re ready to enjoy them again, let them thaw in the fridge for a few hours—no reheating needed. They’ll taste just as delicious!
Why You’ll Love This Recipe
- Quick and easy to make—ready in just 45 minutes!
- No baking required, so you can skip the oven hassle.
- Rich and creamy peanut butter flavor combined with chocolate that’ll have you coming back for more.
- Perfect for parties, snacks, or satisfying that sweet tooth without the guilt.
- Customizable—experiment with different nut butters and toppings!
- Kid-friendly and fun to make together; let them roll the balls!
Trust me, once you try these No Bake Butterfinger Balls, they’ll become a staple in your dessert lineup!
FAQ about No Bake Butterfinger Balls
Can I use crunchy peanut butter instead of creamy?
Absolutely! Crunchy peanut butter will give your No Bake Butterfinger Balls a fun texture. Just keep in mind that it might change the consistency slightly, but it’ll still be delicious!
How long do these treats last in the fridge?
They’ll stay fresh for about a week in an airtight container. But trust me, they probably won’t last that long once you start munching on them!
Can I make these gluten-free?
Yes! Just swap out the graham crackers for gluten-free ones or use crushed gluten-free cookies. You can still achieve that same great flavor!
What if my chocolate is too thick for dipping?
No worries! If you find your melted chocolate is too thick, just add a little more coconut oil to thin it out. Stir well, and it should be perfect for coating.
Can I freeze No Bake Butterfinger Balls?
Definitely! They freeze beautifully. Just make sure to store them in a freezer-safe container, and let them thaw in the fridge before enjoying them again. They’ll taste just as good as fresh!

No Bake Butterfinger Balls: 7 Reasons You’ll Adore Them
- Total Time: 45 minutes
- Yield: 24 balls 1x
- Diet: Vegetarian
Description
A quick and easy dessert made with peanut butter and chocolate, resembling Butterfinger candy.
Ingredients
- 1 cup creamy peanut butter
- 2 cups crushed graham crackers
- 1 cup powdered sugar
- 1 cup chocolate chips
- 2 tablespoons coconut oil
Instructions
- In a bowl, mix peanut butter, crushed graham crackers, and powdered sugar until well combined.
- Form the mixture into small balls and place them on a baking sheet.
- Melt chocolate chips and coconut oil together in a microwave or double boiler.
- Dip each ball into the melted chocolate and return to the baking sheet.
- Refrigerate for at least 30 minutes until the chocolate sets.
Notes
- Store in an airtight container in the refrigerator.
- You can use almond butter as a substitute for peanut butter.
- Experiment with different toppings like crushed nuts or sprinkles.
- Prep Time: 15 minutes
- Cook Time: 0 minutes
- Category: Dessert
- Method: No Bake
- Cuisine: American
Nutrition
- Serving Size: 1 ball
- Calories: 150
- Sugar: 8g
- Sodium: 50mg
- Fat: 9g
- Saturated Fat: 4g
- Unsaturated Fat: 5g
- Trans Fat: 0g
- Carbohydrates: 15g
- Fiber: 1g
- Protein: 3g
- Cholesterol: 0mg
Keywords: No Bake Butterfinger Balls, dessert, easy recipe, chocolate, peanut butter